Saturday, March 22, 2014

Working On More UFOs

If you have been quilting for very long then I am sure that you have a few unfinished objects or UFOs. I have been quilting since about 1984 so I have a few UFOs. Well to be honest I have no idea how many I do have, but I know it is quite a few. I am pushing myself to work on some of these and even if not get them finished just get them to become finished tops. The Fossil Fern Stars quilt is now a finished top without a border. I am still thinking about a border plan for that but while I do I am itching to get going on more projects.

I dug a few bins out of the shed and found some blocks from swaps I had done over the past few years. The one on the front burner is from a log cabin and a bear paw block swap. The blocks are 6" square and are scrappy. I have enough for a nice size quilt for over the sofa or to fit over a double bed. I laid them out on my queen bed and if I add another row of blocks to the top and bottom plus a border it should be just about right. I do need to resew some of the blocks from the log cabin swap as they do not read dark and light. I need 12 log cabin blocks and have 10 that are problem children as they have logs that are dark on some of the light side or vice versa and being the control freak I am that bothers me so I will pick out the offending logs and sew them back together. I have the 4 bear paw blocks needed so those are good. Here are the blocks laid out so far without the two extra rows.

I may change things up a little but for the most part this is what the quilt will look like when pieced.

I also pulled out some 9" blocks from a Dear Jane block swap. For this one I am going to set the blocks on point with a solid color block in alternating squares. Then the setting triangles will be a different solid. Then a border that I have not figured out yet. Again there are some problem children with the blocks that I have so I will correct the problems and make a few more blocks as I need 30 blocks total for my setting. It will fit my Queen bed.
This is not the best photo. I had not planned on positing it when I took it. I just wanted to remember the way I laid things out. This does give an idea of what the layout will look like though. There will be 6 blocks down and 5 across. I need to figure out yardage of the fabrics I will need so I cannot work on this till I go shopping.

Then I pulled out some blocks that were gifted to me by a friend. I am not sure where she found them but I really love vintage quilts. That is really what brought me to quilting when I first began. I have 24 of these blocks and the fabrics are most likely form the 1950's. I am going to set them on point as well with solid blocks alternating. There are again some blocks that were not sewn together very well so I will have to pick some apart and fix them. With this quilt this is a necessity as it will not work without fixing some of these. They are completely machine pieced so once I draft a pattern it should not be so hard. One of the blocks has a black dot in the center so I will add that to each block. I only have 24 blocks and need 25 so I have to find fabric in my stash and make one additional block. I do have just the right yellow solid that actually matches. This will be a labor of love but I am pretty excited about this particular project.

I actually do not know the name of this block so would like to know what it is. Remember there is a dot in the center.


Wednesday, March 12, 2014

The Design Floor

I really need to get a design wall. Well actually in this case it would not have done the job as this is going to be a really big quilt and it would not have fit anyway.

This is the project I recently pulled out of storage to work on at the retreat I attended last month in Phoenix. I did a couple of block swaps on About.com Quilting some years back. We swapped stars in Kona Black and Fossil Fern that had to have more than 12 pieces in complexity. They were really beautiful on their own but recently when I dug them out I decided to do sashing and corner stones to add a bit more. I am glad that I did. I finished the last of the sashing and cornerstones this past weekend. Today I moved the furniture out of the way in the living room and put down a sheet and laid out all the parts. The good thing is that I can look down on them from the balcony above and get a birds eye view. My daughter also gave some input. So here they are all laid out:

Once I got my photo I rolled up the sheet on the diagonal and took it to the sewing room. Now I can slowly unroll it and sew the rows one at a time. Once that is done I will add the large triangles to the outsides and decide on the final border treatment. Hopefully now that I am going on this project again I will have this top sewn together pretty quickly. I think it will make an awesome quilt for my bed.

Sunday, March 9, 2014

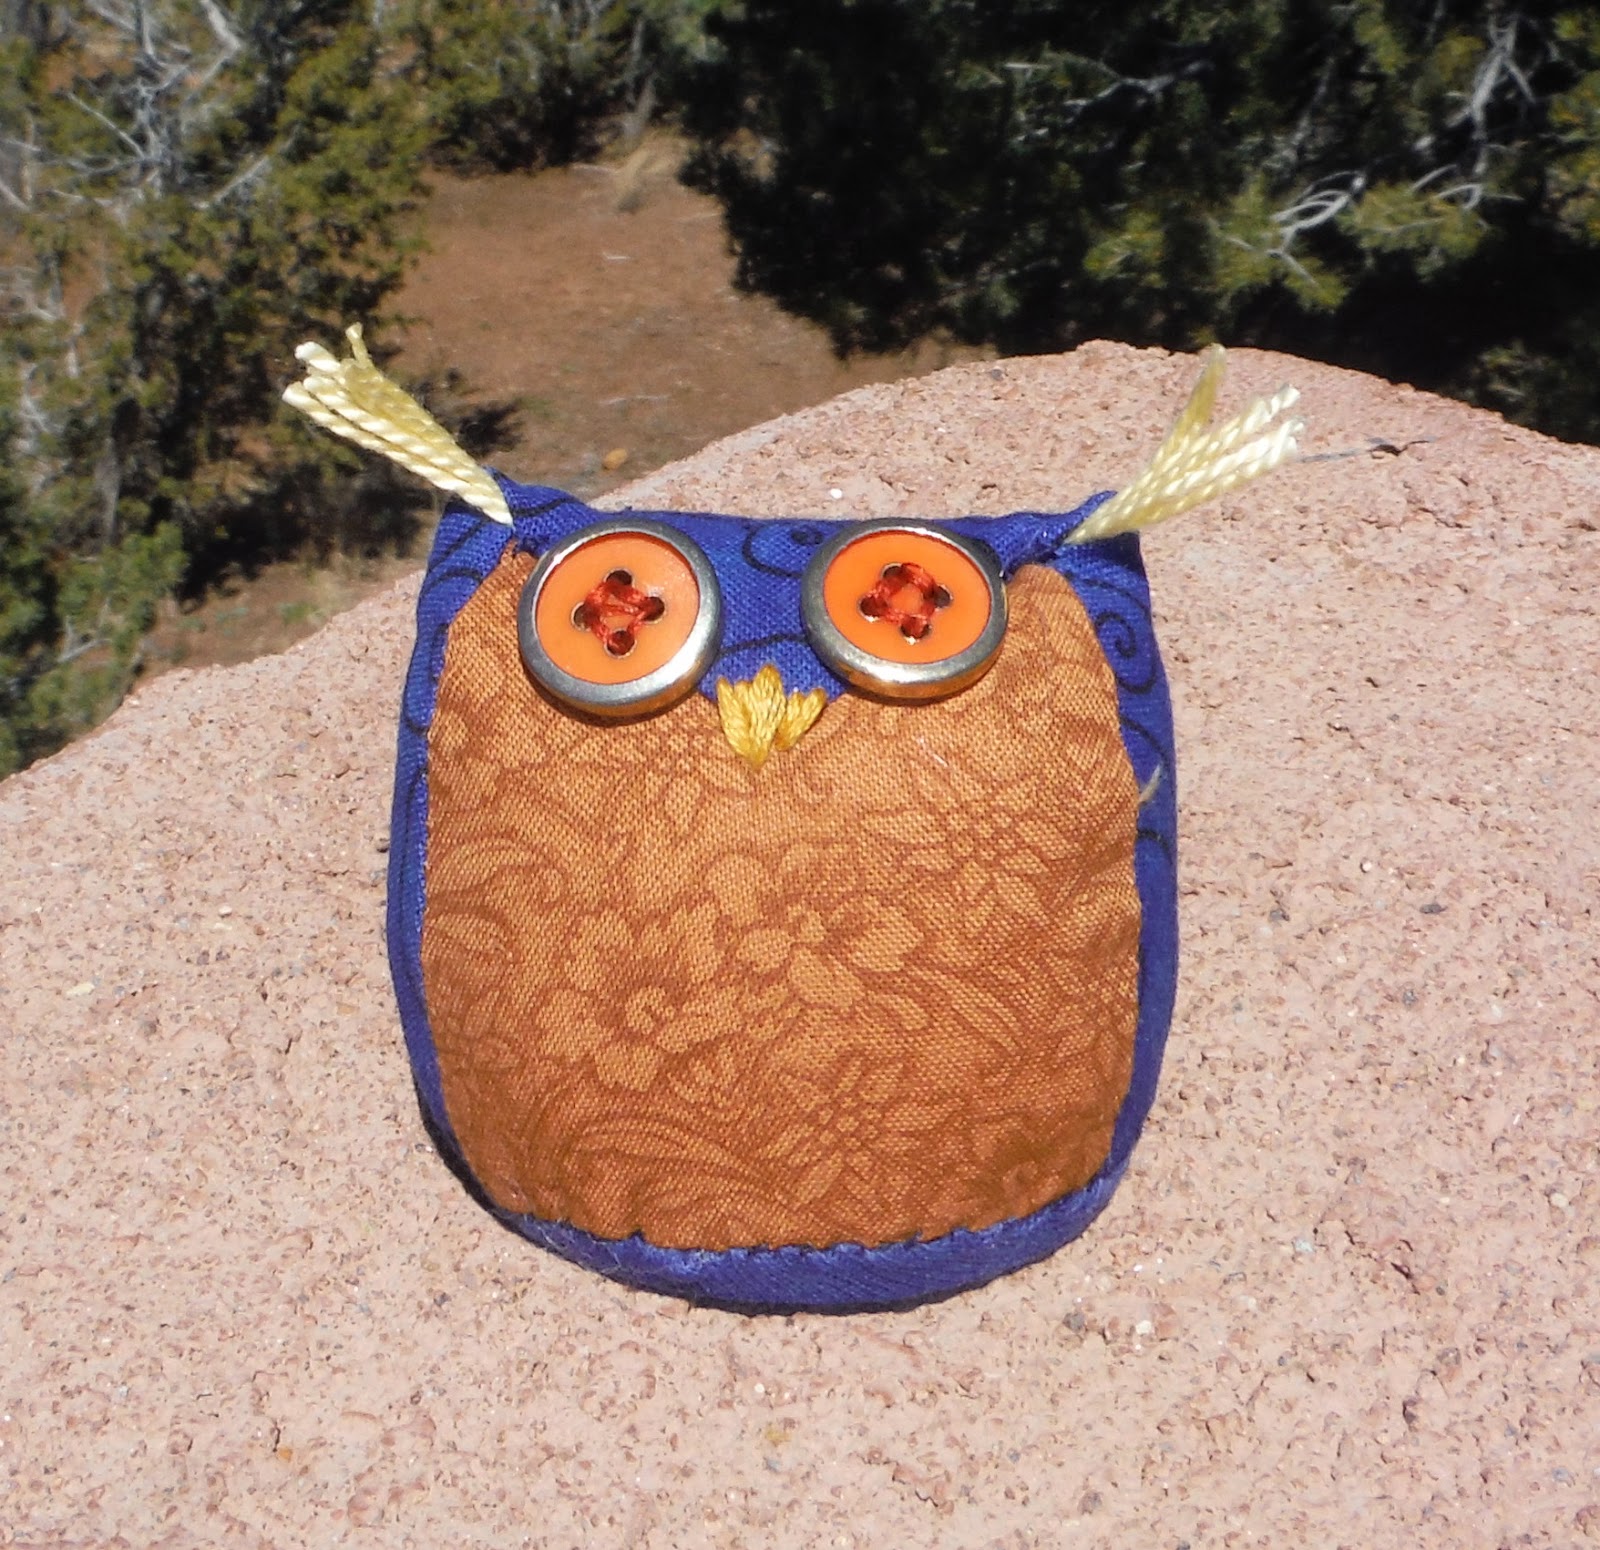
Owl Pincushion

I have been looking at these little sewn owl for some time. I decided to try one today and see if I could figure out how to make one with my own drafted pattern.  He is about 3" tall.
I added a feature of my own the little tufts on the top of his head. He was really fun to make and is soon to take a journey to a new home as I am sending him to a friend of mine. I will definitely make another one of these.

Saturday, March 8, 2014

Scarf From Upcycled Polo Shirt

The other day DH tossed a very well worn polo shirt. It had a few stains and some holes to boot. The fabric was a cotton knit and it was just the right drape and fade to keep for an upcycle project. I decided to make a scarf and a flower from this reject.
There was plenty of fabric in the two sleeves to make three different size flowers. The largest ring is 3" and the smallest one is 2". The drape of this made for a less stiff flower than the last one I made out of a much newer t-shirt upcycle so I had to do a lot more stitching inside the flower to help it hold its shape.


I used a 9" ring to cut 10 circles out of the body of the shirt. Then I cut a spiral about 2" thick out of pairs of these circles. I put 5 strips on each side and tacked them with thread. Then I cut a strip of fabric and wound it around the joined area and tacked it in place. I tied the scarf in a loose knot and added the large flower with a safety pin. It all took less than an hour to make. I think I will wear it tonight to go listen the band down at the pub.


Sunday, March 2, 2014

A Blue Rose

I have a coworker that has been out for six weeks. I really miss her as she makes the most wonderful fabric flowers and always wears one in her hair. She seems to have an endless variety of them in all styles and colors.........bet she does not have a blue rose, so I made one for her out of an upcycled thrift store t-shirt. I hope she likes it. I think I have to make one for myself as well as I still have plenty of the shirt left over. I have already made a scarf out of it and the roses is just from a sleeve and a little from the neckline that was left over.


We finally got some moisture. It really poured last night at the house, but it dumped 14 inches of new snow up at Santa Fe Ski Area so we had a day of skiing today!!!!! What fun!!!! I am learning how to take selfies, me on the chair. A day on the slopes is about the most fun..........the quilts can wait!!


Saturday, March 1, 2014

Back From The Retreat

I used to go to a quilters retreat every February in Phoenix until I went back to work and got so busy. Now that I am back to working part time I reconnected with my quilting friends and went to the retreat last weekend after a three year absence. It was so wonderful to just be around quilters and not have anything else to do for three days but work on projects, visit and go shop hopping. I really got inspired to begin working on some older UFOs that had been put in boxes and were stacked out in the shed.

I finished my Improv III top but did not take a photo. That is the only regret about the retreat, not taking enough pictures. I did take some which is good. I liked the Improv III so much in the cool colors that I had precut another group of 9 fabrics in oranges and blues. I made the first two blocks at the retreat and love this colorway!
I finished another set of two blocks earlier this week but the circles are more oval than rounded so I will recut the two fabrics and make another set as I really love the colors with the pair above.


When deciding what to work on at the retreat I pulled out blocks I had done on an internet swap quite a few years ago. The theme was to make 12" blocks with stars that had to have more than about 14 pieces. The background had to be Kona cotton in black and the other fabrics had to be at least two different colors of Fossil Fern. I took all my black Kona cotton, the stack of 20 pieces of Fossil Fern fabrics in my stash in a rainbow of colors and the stars. I decided I would figure out what to do at the retreat. I found a design wall all the way across the very large room. This turned out to be a good thing because I could see the impact from a distance. The first thing was to put up the blocks. I was going to do a simple black sashing but decided the quilt needed more so I set to work making sashing useing the variety of Fossil Ferns. I also decided to make the cornerstones 3" nine patches. I had no idea from the onset that I needed a total of 80 sashings and 40 nine patches. I only have about half pieced as of this morning. You can see the photo of the beginings of the sashing and nine patches on the design wall at the retreat. I think I am really going to love this quilt when it is done.


 My friend Suze took a class at the Road to California on painting with Tsukineko fabric inks. She brought her inks and some PFD fabric to the retreat so we could play with them. She had some coloring book outlines which we put underneath the fabrics. I love the technique and will definitely be getting some of the inks for myself. I made this cute little chipmunk painting. I think that the inks will work very well for some future pictorial quilts I have planned.


Since I drove to the retreat I decided on a whim to take this old sewing machine that I got at a yard sale for about $5-$15 in the 1980's. I have been dragging it around for about 30 years now and have never done anything with it. My friend Nyla works on old sewing machines and I wanted her to have a look at it. She gave me some advice on how to clean it up, and get it in working order.  I just love the squared off left side and the vine pattern with the gold and green leaves. It will be fun to see if I can actually get her sewing again.