Monday, April 27, 2020

And Now For Something Completely Different

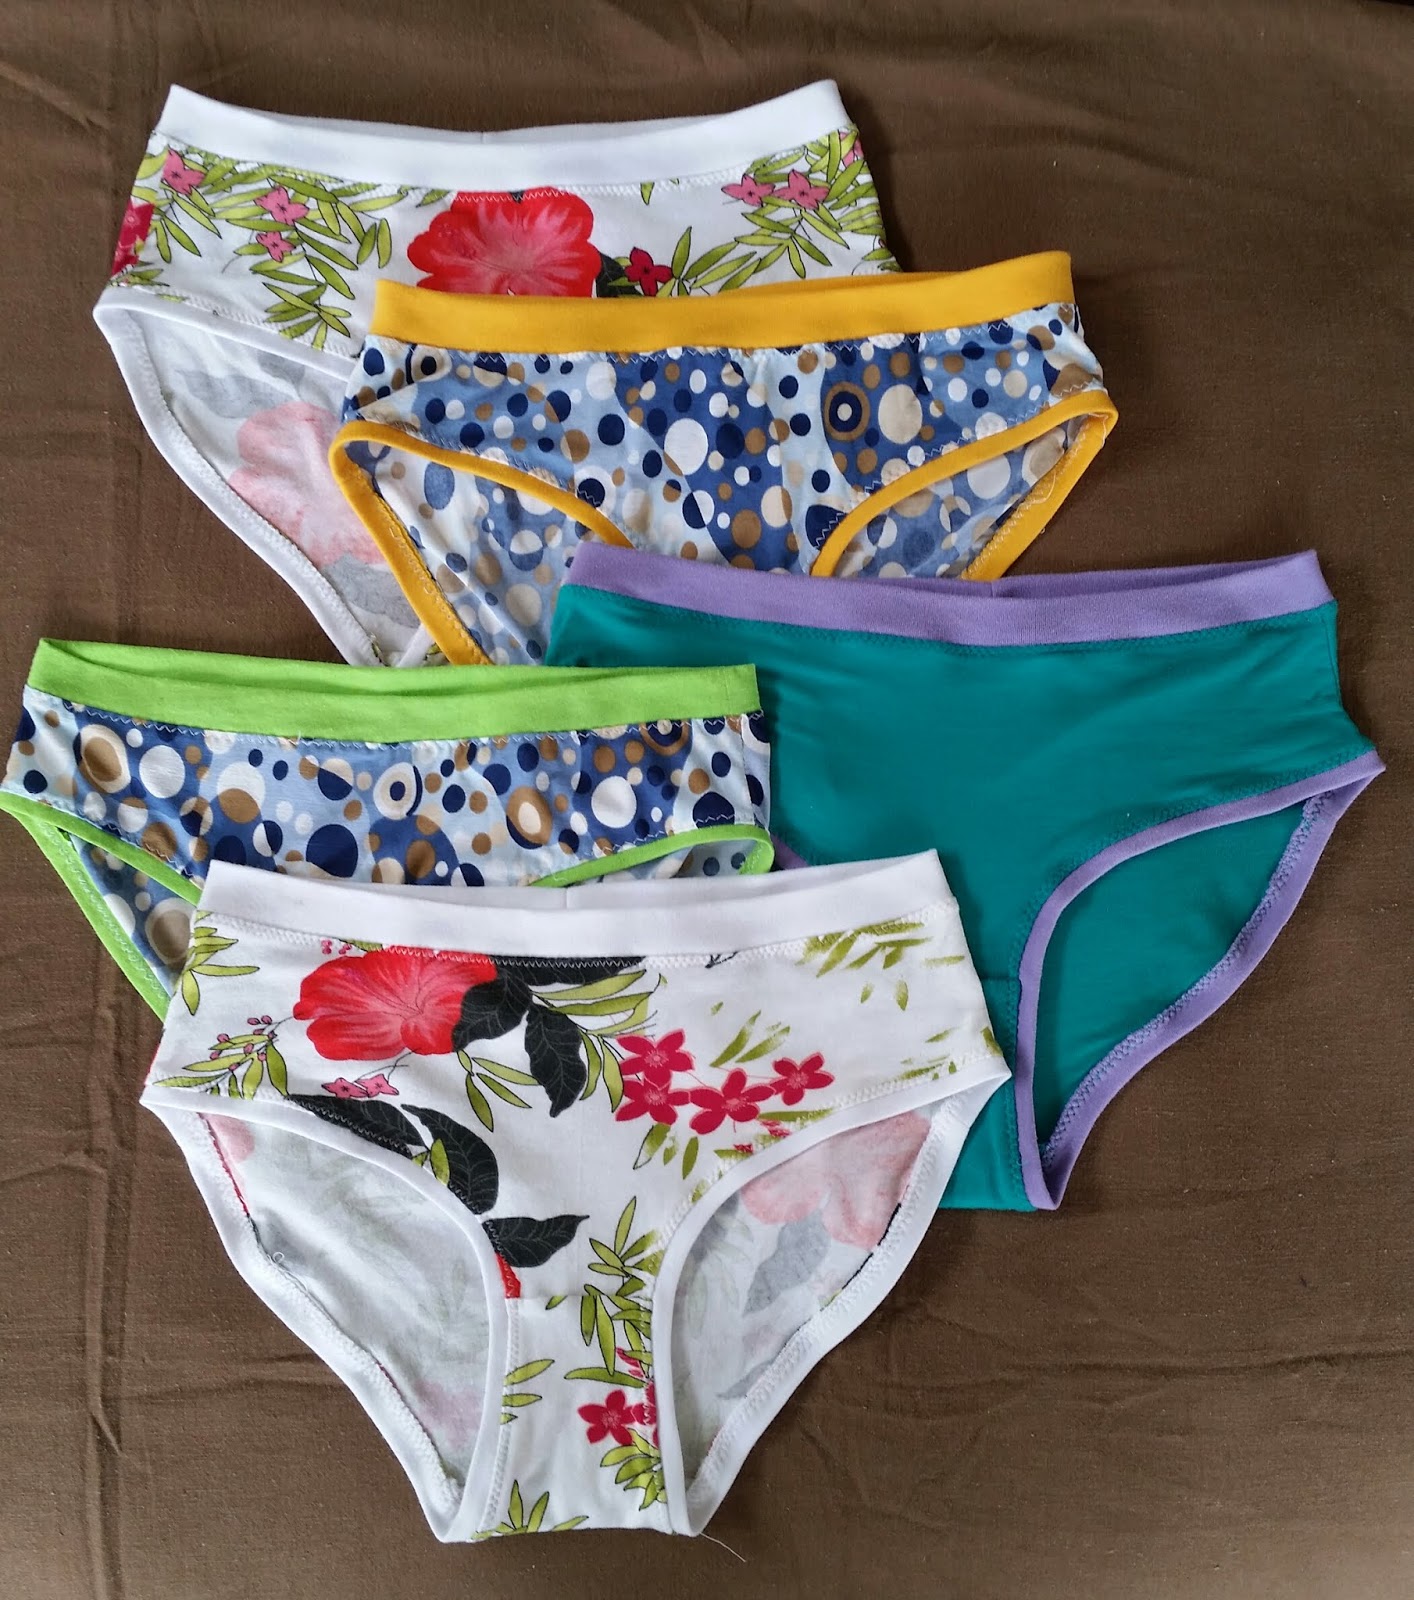
Who would have thought that I would ever sew my own underwear. Quarantine can do that to a person. I was watching one of my favorite sewing youtubers the other night TomKat Stitchery named Whitney and the episode was called "Tutorial: Sewing The Megan Nielsen Acacia Underpants. The pattern is a free download if you go her website and sign up for her newsletter: https://megannielsen.com I have never tried her patterns and this was free so I went to check her out. She has some beautiful pattern. Back to Whitney's video. One of the things she was doing in the tutorial was showing how to use cotton jersey for the waist and leg bands instead of elastic. Ok so I am in quarantine and can't buy elastic. I had a ton for scraps of knits (some I was just gifted recently) so I figured I would just try a pair. As you can from the above photo I made a Spring Collection of lingerie!

The pattern was an easy download and other than trying to adjust my printer to get the scale of the pattern correct the process was a breeze. This is my first time printing a pattern on  paper and taping it all together.........................not so hard. I did make 3 versions of the underwear so I did not cut the pattern, but rather traced two sizes off so I could keep my original pattern intact.


So here is a scrap of fabric I made a top out of years ago. It is a knit fabric of some kind of poly and has a nice drape. I got the fabric online and it was pretty pricey so I saved the leftover scraps as there was enough for maybe a tank top? Well I grabbed this fabric and cut out the size 10. And yes I use pebbles for my pattern weights...................eco friendly and practical. Since I love the great outdoors they are also fun.
I made up the pair with the green bands in a size 10. I used what was left of a cut up t-shirt to make the green bands. I think this is my favorite pair as I love the colors. There was only enough of the green for one pair. I tried them on and they fit snug but not skin tight so I decided to see how the size 12 fit. I traced the 12 pattern pieces and found the yellow cotton jersey in the fabric I was recently gifted and cut the bands out of that. I also decided to cut the waistband at 2 1/2 instead of 2" like the first pair. This pair fits but could be more snug..........they definately fit ok and will be worn but I like the fit of the 10 better.

I found an odd scrap of a beautiful teal knit blend of some sort in the gifted fabric. It was pretty thin as well. I also found the purple cotton jersey in my stash, at some point I must have bought some serious yardage because I already made 3/4 length sleeve top out of it some years back (loved the top till it just got old) and still have serious yardage. Perfect color combo! This time I added an inch to the rise on the size 10. This pair is more stretchy but they look really nice on and fit really well. I love the higher rise.


Here is the alteration I made on the pattern. I simply added 1" to the top and that was it!
Here is the back piece with the 1" added. They do not look that much different but I like the fit better.


The gifted fabric filled up the backseat of my daughter's friend's car and had an amazing amount of variety of different things. I have gone thru all of it to see what there is.............a real treasure trove for sure. The above underwear are made from a small strip of cotton jersey that was just enough to cut the back piece.............the fabric was really wide so I was able to get two pair out of the strip. There are hardly and scraps left. The white bands are again yardage from my stash.
I do love this fabric and was disappointed there was not more to make something...............when I found the underwear pattern I remembered this fabric and decided to see if I could get a pair out of it........well it was enough for two pair!

Thursday, April 23, 2020

Muslin For Blue Linen Pants


During quarantine sewing has become my happy place. I was slow to get going but once I started making things the ideas are just going thru the roof and I have become really productive both making clothes and quilts.

I made these a couple of weeks ago to test the fit for Simplicity 8922. I have been seeing these pants all over my Pinterest feed the past year and just love the relaxed look and the detail at the bottom. I thrifted the tie dye top during the same retreat in February for $1.........what a deal.


I bought a beautiful blue linen fabric in Phoenix during my quilt retreat this February to make a pair. I decided to do a test run before I cut into the linen. I found this fabric in my stash. I had bought and entire bolt at Walmart years ago to use a curtains in my longarm quilting machine area. It is a mystery fabric and was really cheap.............I am thinking it was less than $1 per yard. I did a burn test and it is definitely a poly of some kind but it has a nice weight and a linen look to it so I sewed up a pair.

The top is another thrifted find from last Summer. I just loved the color and casual feel. I do remember it was pretty cheap. I love the color combination with the purple. The shoes are ancient but seemed to work with the outfit so why not.

Right out of the envelope I added 1" to the crotch depth and 4" to the leg length. I really love these and just want to make one more muslin with a few more tweaks. I am going to shorten the legs as I like a little more cropped look. As you can see there is no length adjustment with hemming so the length you cut is what you get. I also want to add just a little more hip ease so will add a little there. Down the road I may try to do an alternate waist treatment with a waistband, side zipper and pleats at the waist instead of gathers but I would really need to think that thru. If I did that I would have to omit the side pockets as the zipper would not work well with that.................and your girls loves pockets.............maybe some external pockets.

Here is the pattern. When I saw view D it was love at first sight, that bottom detail is right up my ally.


The bottom detail is really what drew me to this pattern in the first place. I may play around with this a little as well. It could also look great in a contrast color...........the possibilities are endless.

I have been seeing lots of seamstresses making fun details inside the garments. I had a small amount of this fabric in my garment stash. It is a cotton but slightly heavy for quilting so really not suitable for quilts. Not sure what my original plan was, maybe a top. Well I decided to have some fun and use it for pockets. I also did french seams for the entire garment except for the side seams. Because of the pocket construction trying to figure out a french seam would be really hard so I just serged those.

The little surprise of the pocket from the outside, just a flash of color.

Monday, April 20, 2020

A Cloned Summer Top

Well it is not Summer yet but I decided I needed a fun little sewing project that would sew up fairly quick. I bought the fabric for this top in Phoenix in February. It was a small irregular shaped remnant but I love the print and my friend Kim who was shopping with me talked me into getting it. I figured it would make a simple Summer tank top.

I found a similar top on Pinterest that was a tank shape with a curved hem that had a ruffle around the bottom. Humm..................I don't really need a pattern to do that ruffle. I was just hoping that I would be able to get creative with the cutting layout to be able to get the top I envisioned out of the piece of fabric.


I decided I could draft a pattern for this top as I figured I just needed a tank and I would figure it out from there.


This is a simple little tank top that really fits me nicely. It was actually made from a cloned top I had 25 years or so ago. I cloned that top years ago so this top is also about 25 years old and I still wear it. I did change the bottom and did a curved shape. I have no idea where the original drafted pattern is so I just drafted a new one. I decided where I wanted the ruffle to start and did a curve from the center down to the sides. The center front is 6 inches higher than the center back.


Here are the two pattern pieces. Pretty simple. I just made sure that the side seams matched up. The smaller one is the front.


The finished top came out really nicely. I had to be creative to piece the ruffle and just used what I had. The ruffle finishes at 6" long. I encased the seam that had the ruffle in some seam lace that I had in my stash. The black color does not show from the front so I figured I would use it to give the seam a nice finish.


I made french seams for all the other seams. This fabric was a crinkly rayon of some kind and frayed easily so all the raw edges are encased.

The neckhole and armholes are finished with bias strips. I had to piece this from scraps that I had left. Once I was finished there were hardly any scraps left over. Now I just have to wait for the weather to warm up so I can enjoy wearing this fun little top. Hopefully by the time things warm up the quarantine will be over or there will be nobody to see the top but my family.

Saturday, April 18, 2020

Love This Pattern


I just love this Simplicity Hacking pattern number 8701. To date I have made three versions of them. The first pair was the last photo in this post. I do not just cut out sewing patterns any more like I used to in my earlier sewing days. Somewhere along the line I realized that getting a good fit right out of the envelope was just not gonna happen unless you are making a caftan. For me a test version is usually required to ensure I have a nice fit AND that I like the way the garment looks on me. I trace the pattern onto another paper (I usually use newsprint or a large roll of craft paper). I tape the pieces to a window and tape the paper over it. Then I can just trace things and make the changes I know I need like for pants adding length in the legs as well as the crotch depth. I also measure the hips and waist and may tweak that at this first step as well. For these pants I made two versions of quick shorts out of an old sheet. I only sew the main pieces just to be sure that it fits well before cutting into fabric for a wearable piece. These pants need to be fitted but not tight in the waist and hips so yes this took two tries. I had enough of the mustard fabric for a cropped pair and flared the legs wider on that version. I do not care for the fabric as it is some kind of poly blend but I do like the fit and the color so I wore them a lot last Summer and Fall.

I got about 5 yards of this denim at a shop hop during a quilt retreat in Phoenix a year and a half ago. I love the way these jeans came out. The fit is amazing and they are very comfortable. The fabric was so thick that I could not do belt loops and had to do a hand done buttonhole as it would not fit under that attachment of the machine. I do have enough fabric for a second pair which I will do with a few more modifications. The pockets will be deeper and I figured out a way to do belt loops with less bulk. These jeans have also shrunk about 1/2" with washing even though the fabric was prewashed, so I will wash it a couple more times before I cut them out.

I found a nice lightweight twill in 100% cotton at JoAnn Fabrics for a black pair. With this version I made the pockets deeper and did belt loops. This is my favorite version. I have to wait to get out of quarantine to get my buttonhole foot for my sewing machine as it is up in Colorado and I am in New Mexico. Since I can belt these that is not really a problem for now. This fabric is much thinner so the buttonhole should not be a big deal. I used a medium grey topstitch tread for these and it is perfect for contrast but not in your face white.


Here is some detail of the pockets. This pair is 2" deeper than the mustard and jeans version. I self drafted these pockets. I have a pair of shorts that has a similar pocket and decided to try it. I do love the way it looks.

This last pair is my first wearable version of this pattern. These would only be better if the fabric were cotton instead of polyester. I had this fabric in my stash for years and I figured I had nothing to loose by using it for this pattern. This photo was taken at the airport in Denver when I was heading to Albuquerque last summer.

I highly recommend this pattern, especially if you take the extra time to do some fitting. There are lots of options on the pattern for different looks. I may even put back pockets on my next pair.