This quilt began as a nesting robin back in 2014. A nesting robin is a way to do a quilt in rounds without sending it to a group where each member adds a round to the quilt. The finished top spent some time on the pile of finished tops and I finally quilted it in January of 2018, and added the border in the Summer of 2018.
I am really happy with the fun little quilt as I used a variety of different techniques and really pushed the box for creating a "round robin".
When It came time for the final binding I decided to go very scrappy and just loved the final look in the photo above with the bits of color popping around the edge of the quit.
My word block all trimmed up.
The third prompt was use triangles and I love flying geese. Since they were small they were paper pieced. I actually enjoy this technique for the dead on accuracy it gives and you sew right on tip of the lines which gives a perfect shape every time as long as you take care. This is my paper piecing technique I use when I want if perfect.
The geese being sewn.
I loved the look of the asymmetric geese. The plaid fabric is something I picked up at a retreat. It was on the give away scraps and it was a cheap poly............but it was dead on perfect for the look I wanted so I used it.
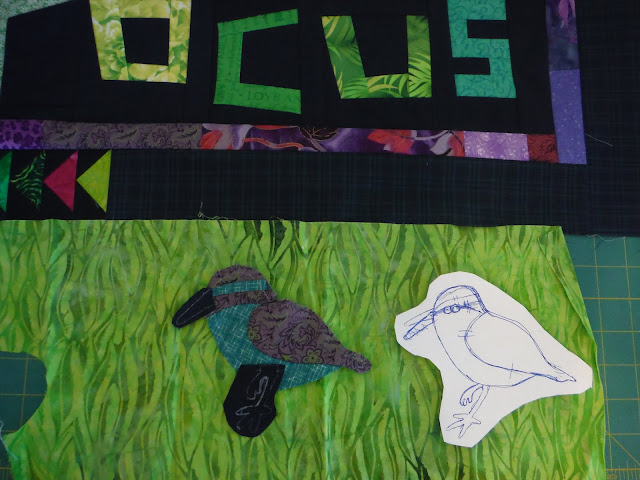
The fourth prompt was flora and fauna. Since I love birds I decided to make a bird. This is the point in the project that I decided not to keep going around the center with borders so I made this as a free standing block. I loved the background fabric above but it did not work well with the focus block so I chose the green below which kinda looks like foliage.
Here is the little bird next to the drawing I used to make him.
Here is an example of how I placed the applique and worked my way around. I love needle turn applique and this was a real challenge.
The color in the photo is not so good but you can see the size of the feet compared to that penny. Yep this really was a total challenge to make the feet so tiny. I just cut away a little of the background as I went which enabled me to keep the shape from stretching.
Here is the finished bird with the first block.
The fifth prompt was to use curves. Again I pushed the envelope and decided that mountains have curves and so flowers so I made a little mountain meadow landscape. This kinda reminded me of the mountain meadows I saw on my backpacking trip in Colorado earlier in the Summer. This technique was inspired by the techniques of Ruth McDowell. The mountains are all machine pieced together and there is no applique in that part.
But wait, now comes the applique as the meadow needed a flower. This was another insane needle turn project. The flower is pretty small and those peddles were again a challenge.
I decided to stuff the brown part of the flower to make it stand out a bit more.
The sixth prompt was "if it has a name it's fair game". I decided to make a group of pinwheel blocks. Those are all separate blocks.
The final top. This took lots of time to figure out how to arrange all the pieces. This top sat untouched for about three years. Because I quilt for other people it was loaded and unloaded from my longarm three times before I was able to finally start the quilting. I am glad that I did wait because the quilting on this project was very detailed...........let's just say I quilted it within an inch of its life. I will do another blog post to show the quilting of this project.
Please leave me a comment and tell me what you think of this project.


No comments:
Post a Comment